
- BACKYARD
- COMMERCIAL
- ENVIRONMENT
- FIELD TURF NEWS
- GOLF
- MAINTENANCE
- NEWS
- PETS
- POOL
- RESIDENTIAL
- TURF TIPS
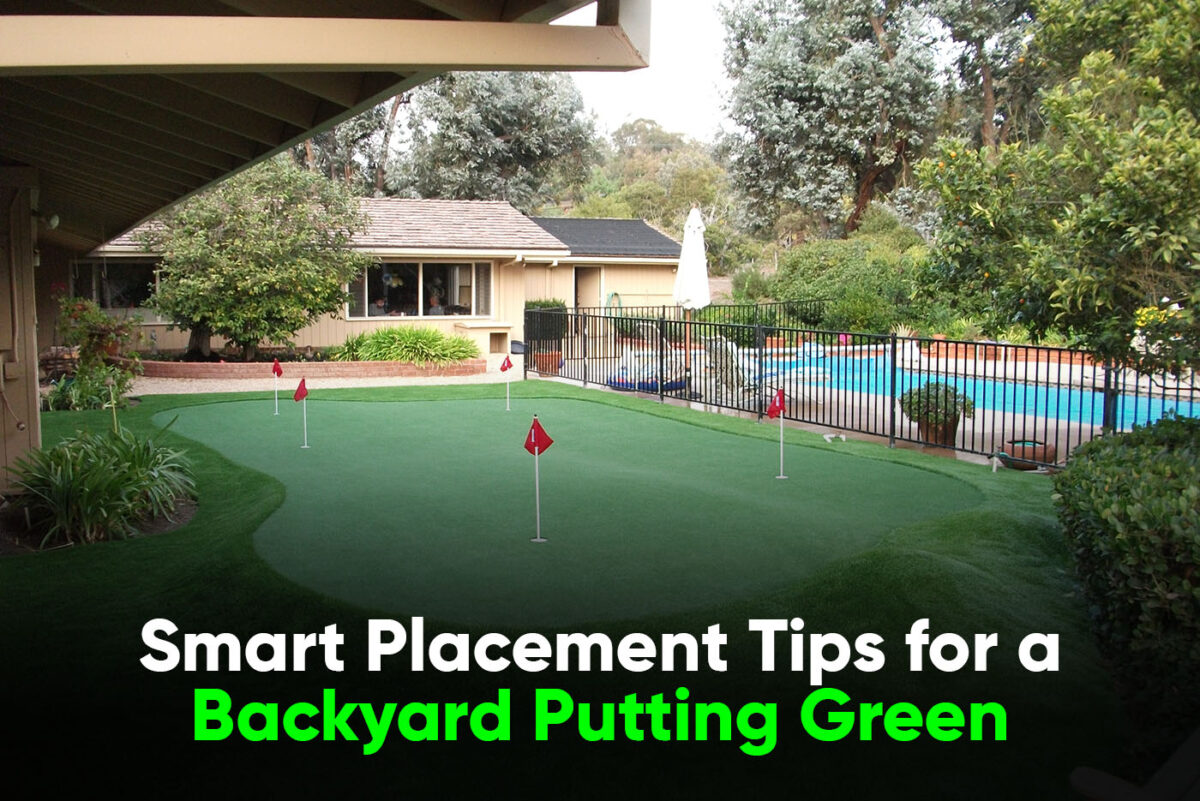
How to Position Your Backyard Putting Green
Location, location, location – this real estate agents’ mantra is also true for backyard putting greens. Before you even start looking at your putting green grass options, you should already have a solid idea of where you want it in the first place.
Of course, it doesn’t have to be perfect, and we’ll talk it more during our consultation. But in the meantime, we recommend taking a walk around your property while keeping these tips in mind.
Optimize Sun Angles for Visibility
Few people think of sunlight direction when planning out their backyard artificial putting green, but it can actually make or break the experience.
For example, east- or west-facing greens suffer intense early morning or late afternoon sun glare and shadows from low angles. As a result, the grass blades can partially block your visual of the ball and cup. South-oriented greens typically gain better sunlight visibility at peak midday times. If a north-south angle won’t fit, shift orientation at minimum 60-75 degrees off direct east or west.
Strategic shade trees also help further control sunlight on the green. Don’t forget to analyze the impacts at various times of day and seasons that alter shade and glare. Spend time visualizing sunlight coverage over a few days to find the most ideal placement.
Take Advantage of Natural Landscape
While a flat oval pad can still make for a fantastic putting green, we highly recommend taking advantage of your yard’s natural terrain. Instead, assess if you can construct part of the green on existing positive slopes and hills of 2-4 feet in height. Just ensure total grade changes across any green dimension stay under 5% inclines so putts can roll true with the putting green turf selected.
Also consider bordering at least 1-2 edges with native planting beds, rock arrangements, garden walls and other backyard features. This adds pleasing natural aesthetics while allowing you to develop interesting risk-reward shot options around these fringe obstacles.
Select a Centrally Located, Functional Area
Quick, unfettered access critically impacts whether you’ll actually invest time into proper short game skill sessions or not.
By situating your personal green an easy 5-10 paces from primary home entryways or pathways, you maximize potential practice hours thanks to sheer convenience. Ensure you maintain at least a 4 foot wide equipment hauling route from storage sheds or garage to the area as well over smooth, flat ground.
Frame Shots Using Interesting Backdrops
Further elevate play by intentionally framing hole approaches, targets and lines-of-sight utilizing surrounding environmental elements. Perhaps plan a par 3 hole to an elevated back-right pin placement aimed at your decorative stone garden fountain in the backdrop.
Strategically use trees, sculptures, water features and garden designs to add challenge catching your eye as you scan the green contours and targets. Remember to also mix hole angles both directly facing features plus playing cuts alongside them for diversity across the full 18 holes.
Start Planning Your Backyard Golf Oasis!
Using smart placement principles guided by sunlight, terrain, convenience and views – your backyard synthetic grass putting green will soon become a golfer’s paradise!
However, there’s also a lot of technical details that go into planning a putting green, so don’t worry if you’re unable to make a decision on your own. The FieldTurf Landscape team provides full custom planning and design services – call us at 866-352-4575 or send us a message to book a free consultation.